
Are you tired of your lush, green lawn and dreaming of a new garden or landscape? Removing sod, or mature grass, might seem hard, but it can be done right with the right method. This guide will show you how to dig up grass with a shovel step-by-step, changing your outdoor space for the better.
Removing sward by hand is often cheaper than using herbicides or renting special equipment. With just a shovel, you can take back your yard and get it ready for your next gardening or landscaping project. Whether you want a new flower bed, a vegetable garden, or a patio, this guide will give you the skills to do it well.
Introduction
Sod, also known as turf, is a great choice for a lush, green lawn. Its mature grass grown and rolled for easy setup. Homeowners might remove sod from their yard for many reasons, like starting a new garden bed or changing the lawn type.
Removing turf is key in lawn or garden makeovers. It lets you see the healthy soil and use the grass elsewhere on your property.
What is Sod and Why Remove It?

Sod grows on farms under the best conditions and then goes to homes or businesses. It’s a fast way to get a new lawn or fix damaged spots. Yet sometimes you need to remove sod, like for a garden makeover or a new landscape.
Removing sod shows you the healthy soil below. This is key for new plants or landscaping. It’s a big step in making over your lawn or garden.
Removing turf takes a lot of work but can change your lawn or garden for the better. Knowing why and how to remove sod helps you do it well. This makes your renovation journey more rewarding.
Preparing for Sod Removal
Tools Needed to Remove Sod
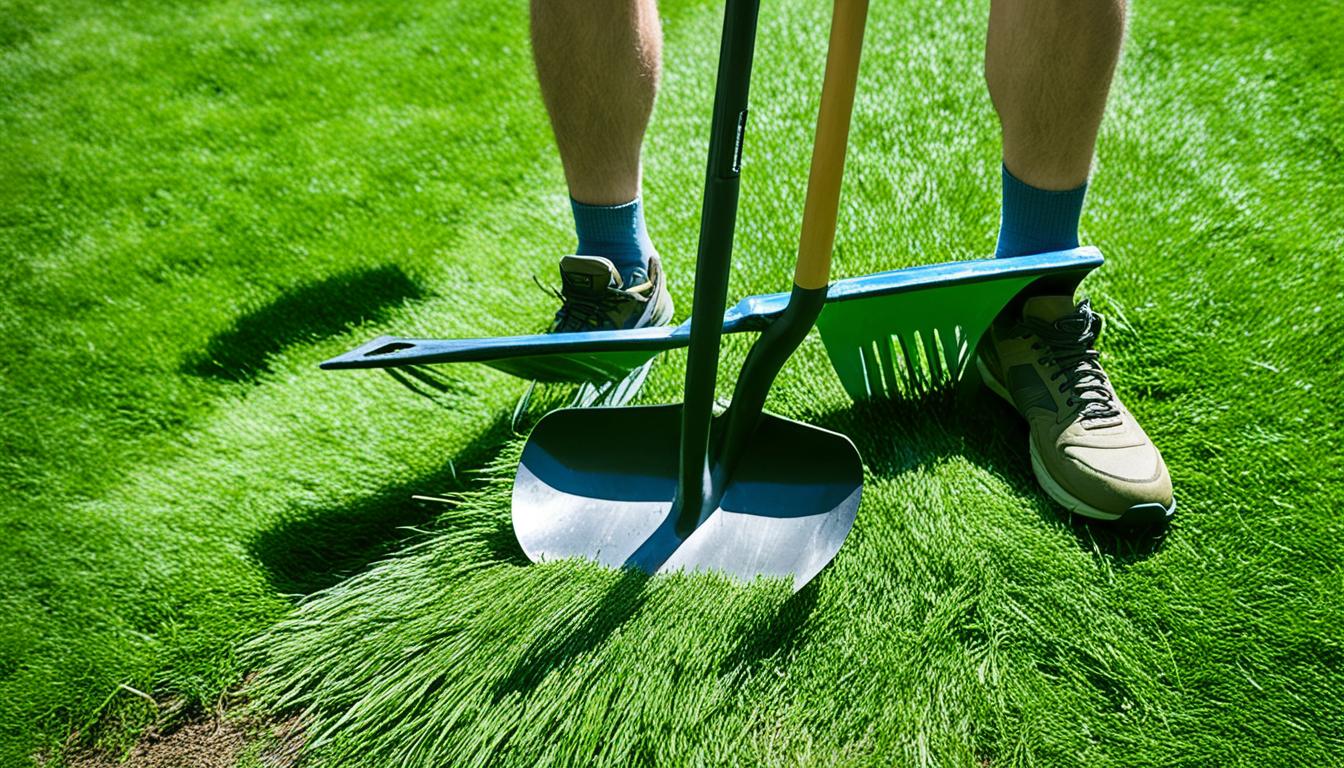
Removing sod by hand takes a lot of effort. But, with the right tools, you can do it more efficiently. Make sure you have everything you need before starting.
A sharp spade or edger is key for removing sod. It cuts through the grass and soil easily, making removal simpler. A wheelbarrow or garden cart is also important for moving the sod to where you want it.
Having a hose or sprinkler ready is a good idea too. It keeps the sod moist, preventing it from drying out and breaking apart. This makes moving the sod to a new spot or preparing the area easier.
Other tools like a sturdy rake, a gardening fork, and a tarp or clear plastic sheeting are helpful. They help collect and move the sod. With the right tools, removing sod becomes easier and less tiring.
Marking the Area for Removal
Before you start removing sod, mark the area you’ll be digging. This makes the process systematic and efficient. Here’s how to mark the sod removal area:
- Measure the distance between the corners of the area you want to remove. This tells you the size and shape of the sod to cut out.
- Use twine, stakes, or marker flags to set the perimeter of the sod removal zone. This marks the work area clearly.
- Or use flour or spray paint to mark the area’s edges. This is great for areas with odd shapes or curves.
Getting the marking removal area right means your layout for the removal will be efficient. By measuring sod removal area first, you avoid waste and confusion during removal.
Removing the Sod by Hand
If you’re tackling a small sod area, you can do it by hand with the right tools. This method takes more effort than using a special tool but is cheaper for small jobs. Here are the steps to remove sod by hand:
- Water the grass a few days before to soften the soil. This makes the sod easier to cut and lift.
- Use a sharp spade or edger to split the sod into strips, about 12 inches wide.
- Then, pry up and lift the sod pieces carefully. Be gentle to avoid harming the grass or soil.
After removing the sod, roll or stack the pieces. Use a wheelbarrow to move them to where you want to replant. This method is great for lawns like Fescue and Bluegrass. They’re easy to remove sod from because of their roots and growth habits.
For big areas, it’s best to get professionals to remove and install the sod. This saves time and effort and helps the new sod grow well. Using a motorized sod cutter is a good idea for large lawns. It makes removing the sod much faster.
Don’t try to remove sod from lawns that are mostly brown or patchy. The roots might grow back, making your lawn look uneven. Make sure to water the lawn well before removing the sod. This helps the soil stay moist, which is key for successful removal and replanting.
After taking out the sod, add soil nutrients and compost to the area. This gets it ready for new grass or plants. Keep an eye on the spot for any new growth. Make sure the soil and plants under the sod are healthy to help the new sod or plants grow well.
How to Dig Up Grass with a Shovel
Step-by-Step Instructions
Digging up grass with a shovel takes effort but is a good way to remove sod or turf. It’s best to start from the back to ease the strain on your back and body. Here’s how to do it step by step:
- First, mark the area you want to remove. Measure and cut the sod strip’s length you’ll take up.
- Then, move to the far side and cut the sod piece’s width, about 1-2 feet long.
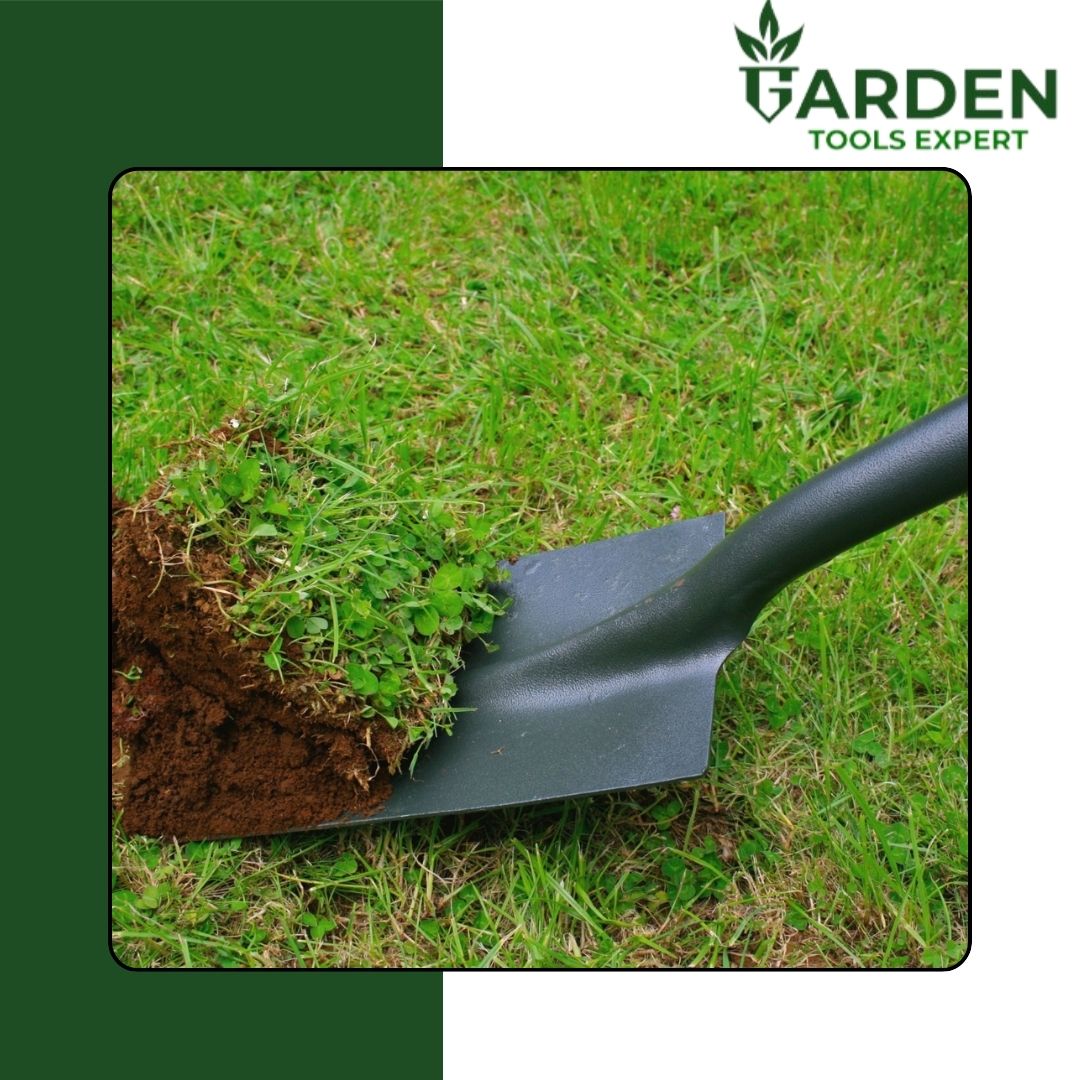
- Use your shovel to pry up the sod’s leading edge gently. Get down on your knees and slice through the roots 1-2 inches below the soil.
- This method lets you lift the sod without taking too much soil. It makes grass removal easier.
- Keep repeating this step-by-step turf removal process, working backwards, until all the sod is removed.
Working backwards gives you leverage and less strain on your back. This sod cutting process might take time but is a good way to remove grass without power tools or chemicals.
The size of the sod pieces you handle depends on your strength. Aim for sections about 18 x 18 inches. With patience and the right technique, you can dig up grass from your lawn with just a shovel.
Alternative Methods of Turf Removal
Removing sod with a shovel is one way to do it, but there is other easiest way to remove turf options too. These depend on the area size and what you have available. Looking into these methods can help you find the best and most affordable way for your project.
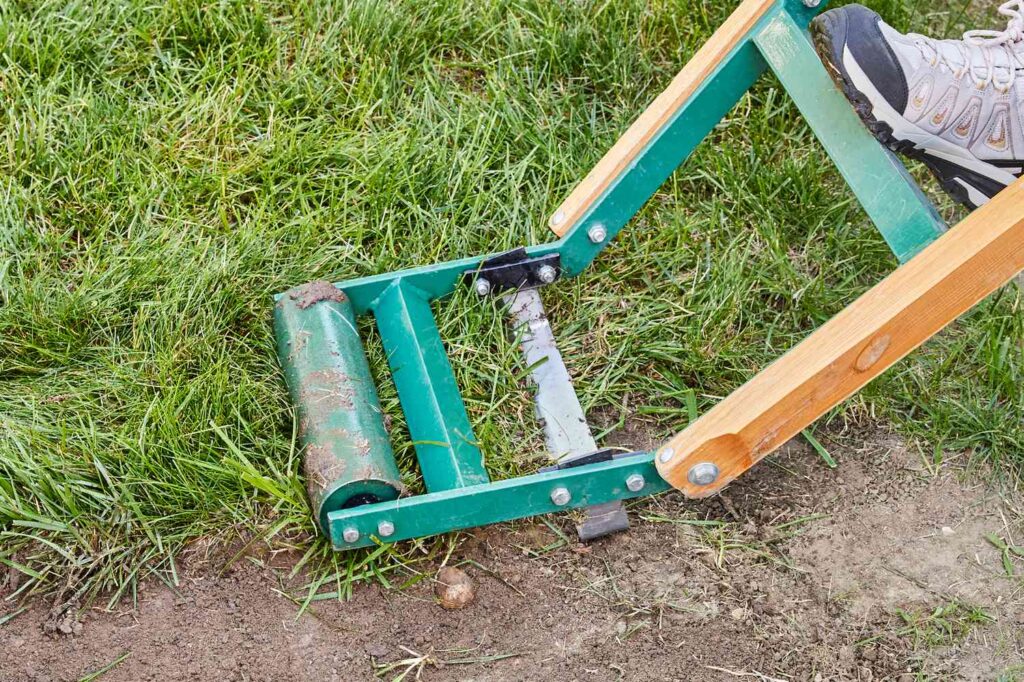
Using a Sod Cutter
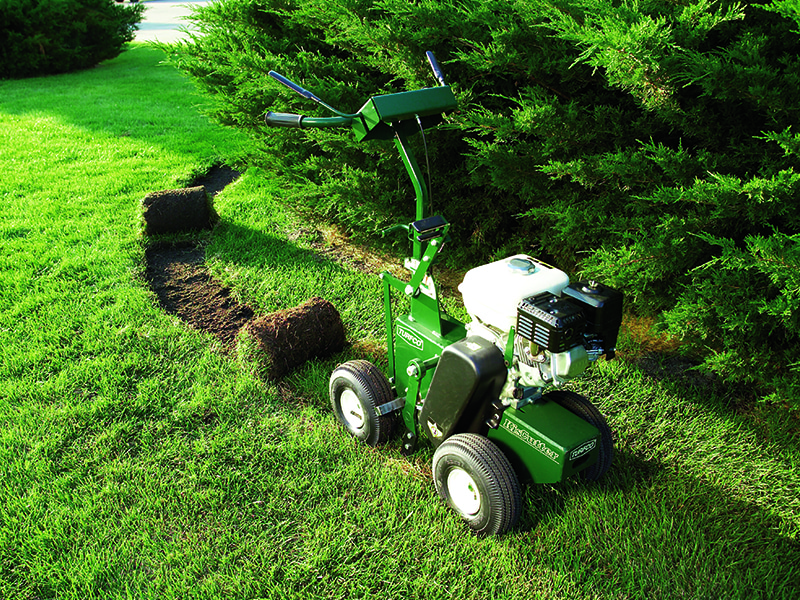
A motorized sod cutter can save you time and effort. It is easy and efficient and cuts through the grass and roots, making it easy to remove sod in strips. Renting a sod cutter from a local supplier is a good idea for big lawns, as it makes removing sod much easier.
Operating a Skid Steer
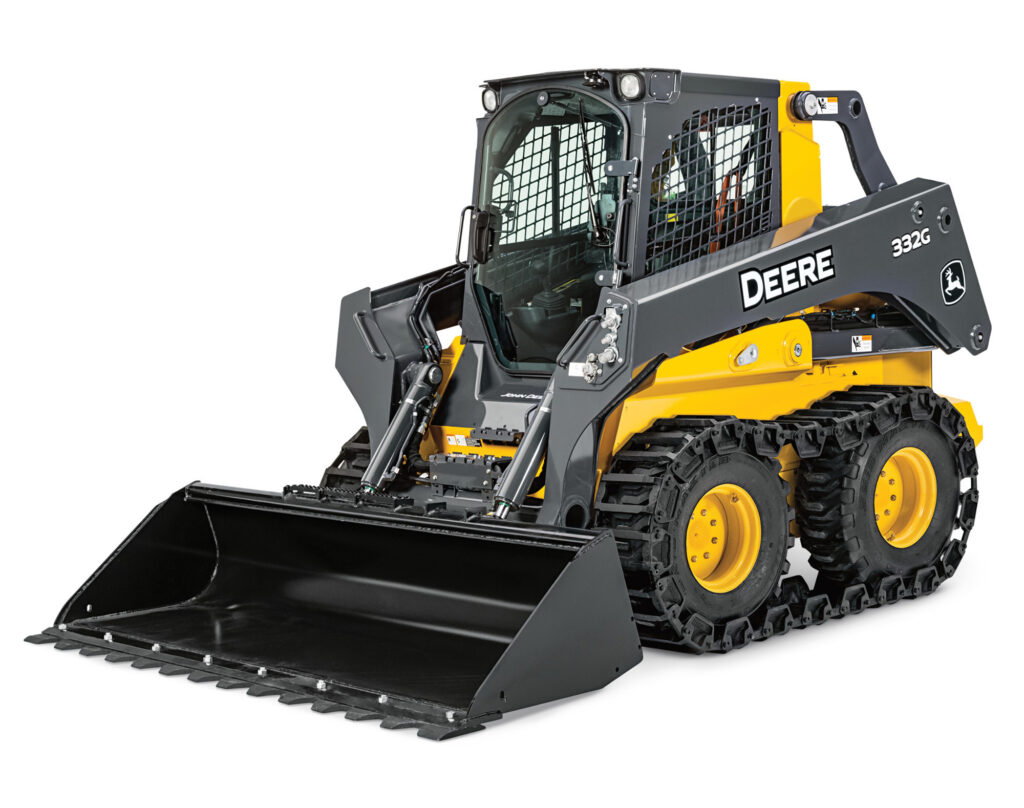
For big lawns, a skid steer is a great tool for removing sod. These machines can quickly clear large areas. But be careful not to damage underground wires or remove too much soil.
Utilizing a Rototiller
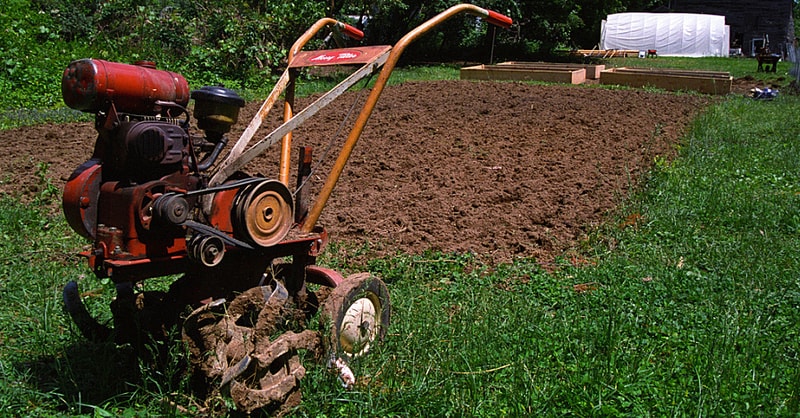
Using a rototiller to break up and remove sod is another option. It works well but might need extra soil work before planting new sod. Make sure the rototiller doesn’t go too deep to avoid disturbing the soil too much.
When choosing how to remove sod, think about your project size, what equipment you have, and your skills. Each method has its own pros and cons. It’s key to look at these to pick the best option for your situation.
Preparing the Area for New Sod or Planting
After removing the existing sod, you’re ready to get the area ready for new sod or plants. This means doing a few key steps to make sure your new lawn or garden grows well.
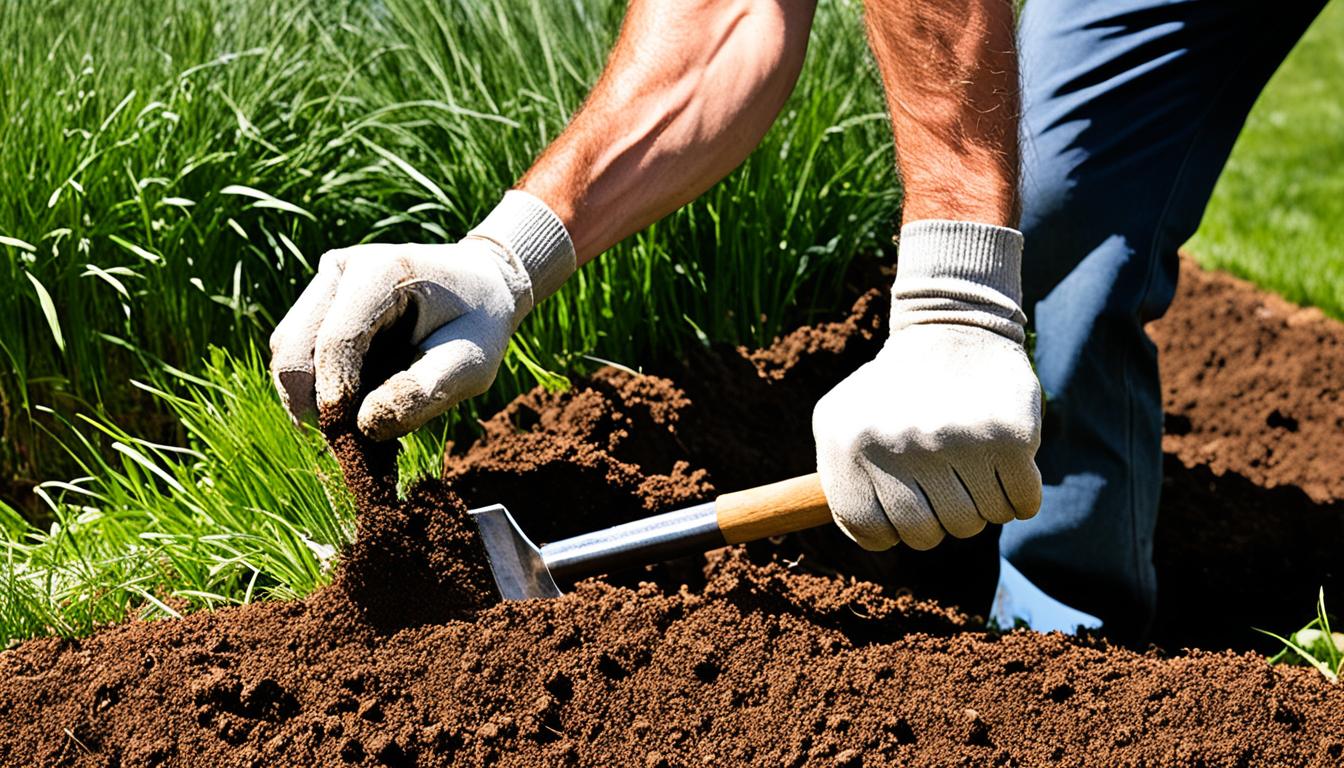
First, get rid of any leftover debris like stumps, rocks, or bricks. This makes sure the ground is smooth and even for your new additions. Then, level out any bumps or dips to make the soil flat.
Next, till the soil 4-6 inches deep. This helps air out the soil and mixes in any needed soil amendments like organic material, topsoil or compost. Adding a starter fertilizer gives your new lawn or garden the nutrients it needs to grow strong.
- Remove any remaining debris, such as stumps, rocks, or bricks
- Grade and smooth the soil surface to create a level foundation
- Till the soil to a depth of 4-6 inches
- Incorporate high-quality topsoil or compost to amend the soil
- Apply a starter fertilizer to provide essential nutrients
Let the soil settle and firm up before putting down new sod or planting. Water the area and wait a few days. This careful soil preparation sets your new lawn or garden up for success.
Conclusion
This guide has shown you how to dig up grass with a shovel. It’s useful for making a new garden, redoing your lawn, or changing an area on your property. Removing sod by hand can save you money and be efficient.
First, prepare well for the job. Then, use the right tools and the “backwards” method of grass removal. This way, you can finish your project successfully.
Think about using a sod cutter, solarization, or sheet mulching for bigger projects or tough spots. Also, make sure the area is ready for new sod or plants. This ensures your new landscape will do well.
With this guide, you’re ready to start your next project. You have the skills and methods for removing grass and get your space ready for new growth. Follow these tips to make your outdoor area beautiful and healthy. Enjoy your new lawn or garden for many years.