There’s a kind of magic in the garden when delphiniums bloom. With their vibrant hues and towering spikes, they’re absolute head-turners! But did you know that the magic doesn’t end with the blooming season? Oh no, it continues long after—right into seed harvesting!
But wait – how do you actually go about this delicate dance of collection? What secrets lie within these small parcels of potential beauty waiting to emerge next spring? What steps should be taken to ensure a successful harvest?
Get ready my fellow gardening enthusiasts because I am about to unveil those secrets! Brace yourself for an exciting journey into the art of how to harvest delphinium seeds. There’s so much more than meets the eye here—and boy, will your eyes be delighted with what awaits ahead.
Identifying the Right Time to Harvest Delphinium Seeds
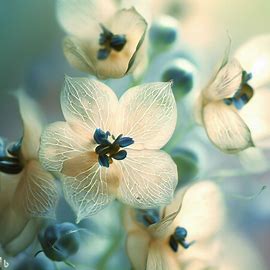
Delphiniums are stunning perennial plants that add a touch of elegance and beauty to any garden.
To ensure a successful harvest of delphinium seeds, it is crucial to identify the right time for harvesting.
When it comes to harvesting delphinium seeds, timing is everything. You want to wait until the seed pods have fully ripened and turned brown or black in color.
This typically occurs towards the end of summer or early fall when your delphinium plant has finished blooming.
Properly Locating and Identifying Seed Pods
To start your delphinium seed-harvesting journey, you need to locate and identify the seed pods on your plant. These pods usually form at the base of each flower spike after pollination.
Look for clusters of elongated capsules with pointed ends; these will contain your precious delphinium seeds. The capsules should feel firm when gently squeezed and not show signs of mold or rotting.
Carefully inspect each flower spike, as some may produce more viable seeds than others due to variations in pollination success.
Careful Removal of Mature Delphinium Seed Pods
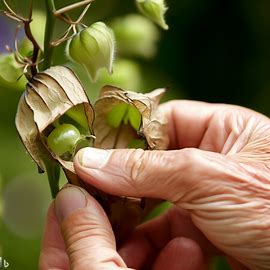
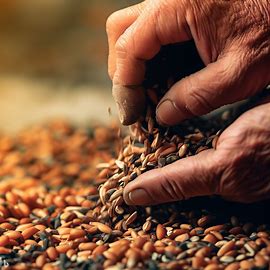
Once you’ve located ripe seed pods on your delphinium plant, it’s time for delicate extraction. Gently twist or cut off individual seed pods using clean pruning shears or scissors.
Be cautious not to damage neighboring flowers or stems during this process.
Place each harvested pod into a separate container so that you can keep track of their different characteristics if desired (such as color variation). Labeling containers with dates also helps monitor storage times later on.
Remember that mature seed pods can burst open and disperse their contents if handled too roughly, so proceed with care.
Clean and Safe Storage Methods for Delphinium Seeds
Before storing delphinium seeds, it’s essential to remove any remaining flower debris or chaff. This can be done by gently rubbing the seed pods between your fingers or utilizing a fine sieve to separate the seeds from unwanted materials.
Once you’ve cleaned the seeds, allow them to air dry for a few days in a cool, dark, and well-ventilated area – preferably indoors. Avoid exposing them to direct sunlight during this process as excessive heat may damage their viability.
Ideal Conditions Needed for Storing Delphinium Seeds Long-Term
To ensure your delphinium seeds remain viable over an extended period, proper storage conditions are crucial. The ideal temperature for storing delphinium seeds is around 32°F (0°C). You can achieve this by placing them in sealed containers such as glass jars or resealable plastic bags and keeping them in the refrigerator.
It’s worth noting that moisture is detrimental to seed longevity. Therefore, add some silica gel packets or rice grains wrapped in paper towels inside each container to help absorb excess moisture effectively.
Remember also to label each container with specific details like seed variety and harvest date for easy tracking later on.
Correct Timing and Techniques for Planting Harvested Seeds
Now that you have successfully harvested and stored your delphinium seeds let’s discuss how best to plant them when the time comes.
Start by filling trays or pots with moistened soilless potting mix. Place one or two delphinium seeds on top of each tray/pot at a depth of approximately 1/8 inch (3mm) – just enough soil coverage without burying the delicate seeds completely.
Delphiniums require light for germination, so avoid covering the seeds with additional soil. Mist the surface lightly to ensure moisture penetration, then cover the tray/pot with a clear plastic lid or plastic wrap to create a mini greenhouse effect.
Place your trays or pots in a warm and bright location, but not under direct sunlight, as this can be too intense for delicate seedlings. Maintain consistent moisture levels by misting regularly or using bottom watering methods.
Possible Challenges in Harvesting and Growing from Delphinium Seeds
Growing delphiniums from seeds can present some challenges that may impact germination rates and overall success.
One common challenge is low germination rates due to seed dormancy. Some delphinium species have protective mechanisms that prevent immediate germination even under ideal conditions.
To overcome this obstacle, you can try stratification – subjecting your stored seeds to cold temperatures for several weeks before planting them indoors.
Another hurdle could be fungal diseases such as damping-off, which affects young seedlings’ health. It is advisable to use sterilized potting mix and maintain proper air circulation around your plants to minimize these risks.
Additionally, practicing good sanitation measures by cleaning tools and containers helps prevent disease spread.
Practical Tips when Dealing with Common Problems in Seed Harvesting
When it comes to any gardening endeavor, problems are bound to arise along the way. Here are some practical tips for dealing with common issues encountered during delphinium seed harvesting:
1. If you’re having trouble identifying ripe pods on your delphinium plant, consider using color indicators like small labels tied around potential pods early on (before they fully mature) so you know which ones are worth monitoring.
2. To improve pollination success and increase viable seed production, consider introducing natural pollinators like bees or butterflies into your garden space.
3. If mold starts appearing on harvested seed pods during drying time, remove affected capsules immediately to prevent further damage or contamination.
4. If you’re unsure whether your delphinium seeds are viable, perform a simple float test by placing them in a bowl of water. Viable seeds will sink while non-viable ones will float and can be discarded.
Conclusion
Learning how to harvest delphinium seeds requires careful observation and attention to detail. By following the steps outlined in this guide, you’ll increase your chances of successfully collecting, storing, and growing beautiful delphinium plants from seed.
With patience and practice, you’ll soon enjoy the rewards of your diligent efforts as vibrant blooms grace your garden year after year.
Happy gardening!