Are you in the mood for a little DIY magic? Well, let’s roll up our sleeves and dive into an unconventional project that melds indoor comfort with outdoor practicality. We’re talking about turning your ordinary utility sink into an extraordinary outdoor water source using none other than a garden hose.
This is not some epic tragedy waiting to unfold but rather a comic relief when you see how easy it is to achieve. It’s just as simple as kids playing connect-the-dots or laying out dominos; however, it ends up being tremendously more beneficial.
Brace yourself for thrilling step-by-step guidance on connecting these humble home appliances—the unsuspecting utility sink and trusty garden hose—in ways you’d never have imagined were possible! So take a deep breath—you’re about to embark on quite the handyman journey through my words.
Choosing the Right Utility Sink Adapter for Garden Hose Connection

Choosing the right utility sink adapter is crucial when it comes to connecting your utility sink to a garden hose.
The adapter serves as the bridge between the faucet and the hose, allowing proper water flow.
There are various types of adapters available in hardware stores or online, so it’s essential to choose one that suits your specific needs.
One popular option is a sink-to-hose adapter, which typically has male threads that fit into the faucet spout and female threads that connect with the garden hose. Make sure you measure your faucet spout diameter before purchasing an adapter.
Another common type of adapter is a quick-connect fitting. This allows you to attach and detach your garden hose easily using simple push-and-pull mechanisms. Quick-connect fittings come in different sizes, so ensure you choose one compatible with both your utility sink and garden hose.
Materials Required for Utility Sink to Garden Hose Hook Up
Before you begin hooking up your utility sink to a garden hose, gather all the necessary materials:
- Utility sink
- Sink-to-hose adapter or quick-connect fitting
- Adjustable wrench
- Teflon tape
- Garden hose
Having these materials ready will make the installation process smoother and more efficient.
Step by Step Process of Attaching the Adapter to the Faucet

Now let’s dive into step-by-step instructions on how to attach an adapter to your utility sink faucet:
1. Turn off water supply: Before starting any plumbing project, always turn off the water supply by closing both hot and cold valves under your sink.
2. Clean faucet threads: It’s important for proper sealing that there are no dirt or debris on the faucet threads where you’ll be attaching the adapter. Use a cloth or brush to clean them thoroughly.
3. Apply Teflon tape: Wrap the faucet threads with Teflon tape in a clockwise direction. This will help create a watertight seal when connecting the adapter.
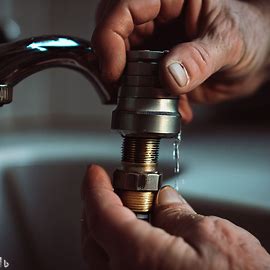
4. Connect sink-to-hose adapter: Screw the sink-to-hose adapter onto the faucet threads, ensuring it is tightly secured with an adjustable wrench. Hand-tightening may not be enough for a secure connection, so use the wrench to tighten it further.
5. Test for leaks: Before moving on to attaching the garden hose, turn on both hot and cold water valves under your sink and check for any leaks around the newly attached sink-to-hose adapter. If there are leaks, tighten it more using an adjustable wrench until they stop.
Connecting and Securing the Garden Hose to the Adapter
Once you have successfully attached the sink-to-hose adapter to your utility sink faucet, follow these steps to connect and secure your garden hose:
1. Inspect garden hose: Check if there are any damages or cracks in your garden hose before connecting it. If there are any issues, replace it with a new one for optimal performance.
2. Attach quick-connect fitting (if applicable): If you’re using a quick-connect fitting instead of a traditional sink-to-hose adapter, attach one end of it securely onto your garden hose.
3. Tightly screw on other end of quick-connect fitting: Take note of which end has male threads and female threads; ensure that you screw on this second end firmly into place on top of your now-attached utility sink/hose connector.
4. Testing connections once again: Turn on both hot and cold water valves under your utility sink slowly while keeping an eye out for any possible leakage from either ends – at what point do they start looking strong? (do this by putting pressure onto each spigot).
With minimal pressure, do the connections look leak-proof? It may take a few seconds for water to flow properly through both ends of the hose.
Troubleshooting Potential Leakage Issues in Connections
While connecting your utility sink to a garden hose, you may encounter leakage issues. Here are some troubleshooting tips:
1. Check for loose connections: Ensure that all fittings are tight and secure. If there is any looseness, use an adjustable wrench to tighten them further.
2. Reapply Teflon tape: If you notice leaks at the faucet threads or other connection points, remove the old Teflon tape and reapply it in a clockwise direction before tightening the fittings again.
3. Inspect hoses and adapters: Examine both your garden hose and sink-to-hose adapter for any damages or cracks that may be causing leaks. Replace them if necessary.
4. Double-check washer placement: Some adapters require washers to create a proper seal between the faucet and adapter. Make sure these washers are correctly positioned and not damaged.
5. Use plumber’s putty (if needed): In certain cases where standard methods don’t seem to solve leakage problems, applying a small amount of plumber’s putty around areas of concern can help create better seals.
Maintenance Tips for Long-lasting Use of Utility Sink with a Garden Hose

To ensure long-lasting use of your utility sink with a garden hose setup, follow these maintenance tips:
1. Regularly inspect connections: Periodically check all connections between the sink, adapter, and garden hose for signs of wear or loosening parts. Applying more Teflon tape periodically will also keep things snug.
2. Tighten as needed: If you notice any looseness during inspections, tighten using an adjustable wrench.
3. Flush out debris from hoses: After each use or when switching from one attachment/tool cleaning task to another, purge the remaining water from the hoses. Simply turn off both hot and cold valves under your sink after disconnecting the garden hose, and run water through it for a few seconds.
4. Store properly: When not in use, coil up your garden hose and store it in a dry place to prevent damage or exposure to harsh weather conditions.
Safety Measures While Using a Utility Sink with a Garden Hose
When using your utility sink with a garden hose, keep these safety measures in mind:
1. Wear protective gear: Depending on the task at hand, wearing gloves, goggles or aprons may be necessary. Always protect yourself when working with tools or handling chemicals/cleaning agents.
2. Use caution when handling hot water: If you are using hot water from your utility sink, be cautious of potential burns. Test the temperature before immersing anything sensitive like skin directly into that stream.
3. Be prepared: Restoration project are always full of surprises. Remember that managing installation errors is also part of any plumbing project, so being prepared mentally always helps!
Conclusion
Understanding how to hook up utility sink to garden hoses can greatly enhance your convenience and efficiency in various tasks around your home or outdoor space.
By following the steps outlined in this guide, you can successfully connect the utility sink to a garden hose, enabling you to tackle a wide range of cleaning, gardening, and maintenance activities.
Remember to gather the necessary tools and materials, carefully follow the installation process, and ensure proper sealing and connections to avoid any leaks or complications.
With the right knowledge and preparation, you’ll be able to enjoy the benefits of a versatile utility sink that seamlessly integrates with your garden hose, making your daily chores and projects more manageable and enjoyable.


