Winter is knocking at our door, and it’s time to get crafty. Bracing ourselves for the frosty onslaught, we’re rolling up our sleeves and taking on an often overlooked task — outfitting our outdoor faucets with their winter armor. It sounds tedious, but trust us when we say it can be as easy as pie!
In this homeowner’s guide, I’ll walk you through the quick and painless process of how to put on outside faucet covers effectively. With simplicity at its core and cost-effectiveness that will make you smile, this trick can save your pipes from freezing while adding another feather in your DIY cap.
Stay tuned because up next we dive into the nitty-gritty of securing your home before winter comes knocking. Let’s transform this seemingly daunting task into a delightful DIY adventure together!
Choosing the Right Outside Faucet Cover

When it comes to protecting your outdoor faucets during colder months, using a faucet cover is essential.
Before you start, make sure you choose the right cover for your specific faucet.
Look for covers made from high-quality materials that are durable and waterproof.
Preparation for Installing the Outdoor Faucet Cover
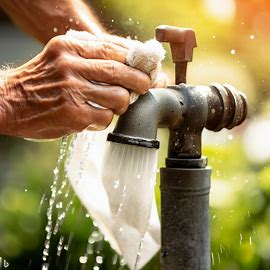
Before installing the faucet cover, gather all the necessary tools and materials. You will need a tape measure, scissors or a utility knife, and possibly some insulation depending on your climate. Make sure to clean any debris or dirt around the faucet area as well.
Steps to Properly Fit the Outdoor Faucet Cover
1. Start by measuring your outdoor faucets to ensure you select an appropriately sized cover.
- Measure both the length and diameter of each faucet.
- Choose a cover that matches these measurements closely.
2. If necessary, cut out any holes in the faucet cover where handles or other fixtures protrude.
3. Slide the cover over your outdoor faucets until it fits snugly against them.
4. For additional protection against freezing temperatures, consider adding insulation inside the faucet covers.
5. Securely fasten or tighten any straps or drawstrings provided with your chosen outdoor faucet cover design.
Ensuring a Snug Fit of The Faucet Cover
It’s important that your outside faucet covers fit tightly to prevent any potential heat loss during winter months.
- Check if there are any gaps between the faucets and their respective covers after installation.
- Adjust as needed by repositioning or tightening straps.
Checking For Leaks After Installation
Once you have installed all of your outside faucet covers, it’s crucial to check for any leaks. This step will ensure that your faucets are properly protected.
- Turn on the water supply to each faucet and inspect for any drips or water seepage around the cover.
- If you detect a leak, readjust the cover or use additional insulation until the issue is resolved.
Maintaining and Cleaning Your Outdoor Faucet Cover
Regular maintenance of your outdoor faucet covers will extend their longevity and effectiveness. To do this:
- Inspect them regularly throughout winter, ensuring they remain securely fastened and intact.
- Clean off any dirt or debris using a mild detergent solution and rinse thoroughly with water.
Replacing an Old or Damaged Outside Faucet Cover
If you have an old or damaged outside faucet cover, it’s essential to replace it promptly to maintain proper protection during colder months. Here are some procedure tips:
1. Remove the old cover by undoing any straps or drawstrings holding it in place.
2. Measure your faucet once again to ensure you choose the correct size for replacement.
3. Follow steps 3 through 5 as outlined in the “Steps to Properly Fit The Outdoor Faucet Cover” section.
Final Thoughts
Protecting your outdoor faucets from freezing temperatures is vital in preventing costly repairs come springtime.
By following these step-by-step instructions on how to put on an outside faucet cover properly, you can rest assured knowing that your garden taps are well-insulated and safeguarded against frost damage.
Stay proactive in maintaining these covers throughout winter so they continue providing reliable protection year after year.