
Deep down, beneath layers of soil and stone lies your potential paradise – it’s just awaiting discovery! You may have found yourself on many an occasion gripping the rake handle tight, sweat trickling down your foreheads as you battled persistent pebbles. Yet with sheer determination (and yes some grit too), victory was yours!
Keep reading if you’re ready to become a master raker: turning rocky territories into fertile frontiers without losing your sanity or breaking your back. The journey ahead won’t be easy, but believe me when I say every bead of sweat will be worth it when you see what lies beneath.
Prepare yourself now for a rollicking adventure filled with practical tips and ingenious tricks that are guaranteed to smooth out even the most insurmountable landscapes. Let’s navigate this bumpy path together; who knows what treasures await underfoot?
Choosing the Appropriate Rake for the Task
Finding the right rake for removing rocks from dirt is essential to ensure efficiency and effectiveness.
There are various types of rakes available, but not all of them are suitable for this particular task.
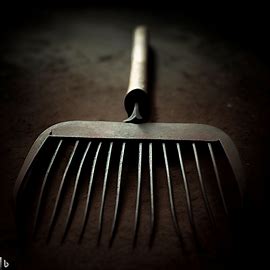
Look for a landscaping rake that has sturdy teeth or tines designed specifically for rock removal.
One popular option is a bow rake, which has sharp, flat teeth that can easily gather rocks without damaging the surrounding dirt.
Another choice could be a grading rake with its long handle and adjustable angle head, allowing you to reach difficult areas such as corners or along fences.
Whichever type of rake you choose, make sure it feels comfortable in your hands and suits your physical abilities. This will help prevent fatigue while working on clearing stones from your garden.
Preparation of Area and Safety Considerations
Before starting the process of raking rocks out of dirt, it’s important to prepare the area properly and consider safety precautions. Here are some steps to follow:
1. Clear any debris or large obstacles like tree branches or toys from the yard.
2. Check for underground utilities such as pipes or cables using utility marking flags if necessary.
3. Wear appropriate protective gear like gloves, goggles, and sturdy shoes to protect yourself from injury.
4. Ensure good visibility by choosing a time when there is ample daylight available.
5 . Mark any sensitive plants or flower beds that may need extra care during the rock removal process.
Taking these precautions will help create a safe environment while preventing damage to property and minimizing accidents.
Techniques in Raking Rocks out of Dirt
When it comes to actually raking rocks out of dirt, employing proper techniques can save time and effort:
Firstly, start at one end of the area and work your way across in a systematic manner. Avoid random raking as it can make the process tedious and less efficient.
Hold the rake firmly but avoid excessive force that could damage the soil or cause strain on your muscles. Use short, controlled strokes to gather rocks towards you, allowing ample time for them to collect in one place.
If there are larger rocks that cannot be easily moved with a rake alone, consider using a shovel or hand tools to remove them individually.
Sorting and Separating Rocks from Soil
Once you have gathered an adequate amount of rocks through raking, it’s time to sort and separate them from the soil:
- Spread out a large tarp or sheet nearby where you can empty your rake periodically. This will help keep the gathering space free of clutter while providing an easy means for sorting later on.
- To separate smaller rocks from dirt efficiently, create piles where these two elements can be separated manually. Grab handfuls of gathered rocks with both hands and let the fine dirt particles fall back onto the ground naturally.
- For more precision in separating out finer debris like sand or silt, consider using screens or sifters that allow only small particles to pass through while retaining larger stones on top.
Disposal or Reuse of Gathered Rocks
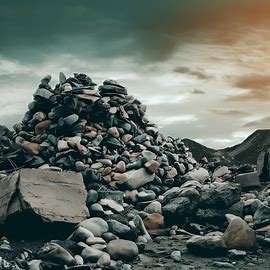
Once you’ve successfully removed rocks from your yard, deciding what to do with them is another important aspect:
If the gathered rocks are small enough and in good condition, they can be reused elsewhere in landscaping projects. Some ideas include:
- Creating rock borders around flower beds or pathways
- Constructing garden walls for visual appeal
- Even building decorative features like rock sculptures.
On the other hand, if there is an excess quantity of unwanted stones that cannot be repurposed within your own landscape design plans, consider donating them.
Check local gardening communities, landscaping shops, construction sites, etc. that might be interested in taking them off your hands.
If recycling or donating is not an option, contact the local waste management facility to inquire about proper disposal methods.
Handling Different Sizes and Types of Rock Debris
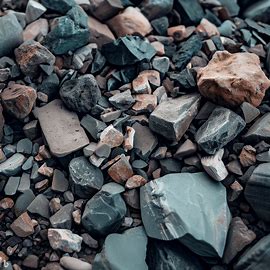
Rocks come in various sizes and types, which require different handling techniques:
For smaller rocks (typically less than an inch in diameter), a rake alone may be sufficient for removal.
However, it is essential to work slowly and deliberately to avoid damaging the surrounding soil.
When dealing with larger rocks that cannot be effectively raked up, using a shovel or hand tools like pry bars or rock forks will allow you to lift and remove them individually.
Ensure proper body mechanics while lifting heavier objects to prevent strain or injury.
Be cautious when encountering sharp-edged or pointed rocks as they can pose risks during removal. Wear protective gloves and handle these types of rocks with care.
Maintaining Your Tools After Use
After completing the task of raking rocks out of dirt, it’s important to take care of your tools for future use:
1. Clean any dirt or debris from the rake by hosing it down after each use. This prevents accumulation that could affect its performance over time.
2. Inspect the teeth or tines for any signs of damage such as bending, cracking, or dullness. Replace damaged parts if necessary to ensure optimal functionality.
3. Store your rakes in a dry place where they are protected from weather elements and potential damage caused by other garden tools.
A Final Word
By following this step-by-step guide on how to rake rocks out of dirt, you’ll achieve a clean yard without much hassle.
Remember – patience, persistence, correct tool selection, safe work practices, sorting techniques, and suitable disposal options – all contribute towards making this process efficient and successful.