Bromeliads are tropical beauties that can turn any space into a mini rainforest paradise with their flamboyant foliage and dramatic flowers. But perhaps you’ve noticed that after blooming splendidly for months, these plants have started looking a bit gloomy.
Don’t fret! We’re here to breathe new life back into your beloved bromeliad. It’s not rocket science but rather a simple yet artistic act of replanting them correctly. The difference between an ordinary plant and an extraordinary one? Well, it’s all in the way you replant it!
In this piece, we will guide you on how to become an expert at caring for and replanting these tropical marvels so they keep exuding warmth and beauty like only they can. So put on your gardening gloves because we are delving deep into the captivating world of bromeliads ahead!
1. Choosing the Right Time to Replant Your Bromeliad
When it comes to replanting your bromeliad, timing is key. You want to choose a time when the plant is not actively flowering or producing pups.
Ideally, this would be during the early spring or late summer when the plant enters its dormant phase. By selecting the right time, you give your bromeliad a better chance of adjusting and thriving in its new environment.
2. Identifying Suitable Containers for Repotting Bromeliads
Selecting an appropriate container for repotting your bromeliad is essential for its overall health and well-being.
The container should have drainage holes to prevent waterlogging, which can lead to root rot.
Additionally, it should be slightly larger than the current pot size to allow room for growth.
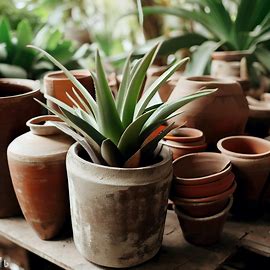
Plastic or terracotta pots are great choices as they provide good airflow and stability.
Terracotta Pots:
Terracotta pots are porous and allow air exchange between soil and atmosphere which helps in preventing overwatering issues.
Plastic Pots:
Plastic pots retain moisture more efficiently than terracotta pots but may require careful monitoring of watering frequency.
It’s also important to ensure that your chosen pot has enough weight so that it doesn’t tip over easily if your bromeliad grows tall or blooms with large flowers.
3. Selecting the Appropriate Soil Mix for Bromeliads
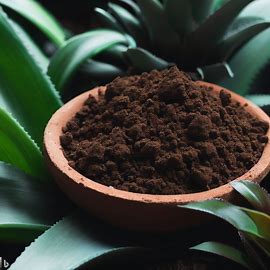
Bromeliads have unique soil requirements due to their epiphytic nature. They typically grow on trees in their natural habitats rather than in soil directly.
Therefore, using regular potting soil won’t suffice for these plants.
For optimal growth and development, consider mixing one part regular potting soil with two parts orchid bark or perlite.
This combination provides excellent drainage while still retaining some moisture, mimicking the bromeliads’ natural environment.
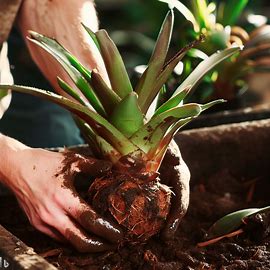
4. Transferring Your Bromeliad Safely to its New Spot
When it comes to transferring your bromeliad to its new pot, you need to do so with care and precision. Follow these steps for a smooth replanting process:
1. Gently remove the plant from its current pot by holding the base of the plant and lightly tapping the container’s sides.
2. Shake off excess soil from the roots but be careful not to damage them.
3. Place fresh potting mix at the bottom of your new container, ensuring there is enough depth for root development.
4. Position your bromeliad in the center of the new pot, making sure that it sits at approximately the same level as before.
5. Carefully fill in the remaining space around and on top of the roots with more potting mix, gently pressing down as you go.
6. Water lightly immediately after repotting.
5. Watering and Caring for a Recently Replanted Bromeliad
After repotting your bromeliad, it’s crucial to establish proper watering habits to ensure successful growth and health.
The key is finding a balance between under-watering and over-watering. Allow the soil surface to dry out slightly between waterings but avoid letting it become bone-dry.
During summer months, when temperatures are higher and evaporation rates increase, you may need to water more frequently than during cooler seasons.
When watering your bromeliad, aim for thorough saturation without creating standing water in your chosen container’s saucer or tray – this can lead to rot issues later on.
Lastly, remember that most bromeliads have specialized leaf structures called “tank” rosettes that collect rainwater in their natural habitats. To mimic this, water the plant by pouring directly into the center of its rosette, ensuring it fills up.
6. Troubleshooting Common Problems After Replanting
Even with proper care and attention, issues may arise after repotting your bromeliad. Here are some common problems and how to troubleshoot them:
1. Yellowing leaves: This can be a sign of overwatering or insufficient light. Adjust watering frequency and ensure your bromeliad receives adequate indirect sunlight.
2. Root rot: If you notice mushy or brown roots, root rot may be present due to excessive moisture in the soil. Take immediate action by cutting away affected roots and adjusting your watering habits accordingly.
3. Pests: Bromeliads can be susceptible to pests such as mealybugs or scale insects. Regularly inspect your plant for any signs of infestation and treat with appropriate insecticides if necessary.
7. Ongoing Maintenance of Repotted Bromeliads
Once you’ve successfully replanted your bromeliad, ongoing maintenance is crucial for its continued health and vibrancy.
Regularly monitor soil moisture levels to prevent both under-watering and over-watering scenarios. Remember that bromeliads prefer slightly drier conditions compared to other houseplants.
Additionally, provide adequate indirect sunlight for optimal growth – placing your plant near a window that receives bright but filtered light is ideal.
Every few weeks, feed your bromeliad with a diluted liquid fertilizer specifically formulated for epiphytic plants like orchids or bromeliads to promote healthy foliage growth.
Lastly, keep an eye out for any signs of overcrowding – if pups start emerging from the base of the mother plant, carefully separate them when they become large enough to handle without damaging their fragile roots.
Conclusion
Knowing how to replant a bromeliad properly ensures its successful adaptation to a new pot and environment.
By carefully selecting suitable containers, using the right soil mix, and following proper watering techniques, you can enjoy a thriving bromeliad that adds beauty to your indoor space.
Remember to troubleshoot any issues promptly and provide ongoing care for long-term success with your replanted bromeliads.