
Ever tried to stretch a fence all by your lonesome? It’s one of those do-it-yourself tasks that sounds simpler than it actually turns out to be. But don’t worry, we’re here to turn this uphill task into a gentle slope for you.
Sure, fence stretching might not have the same allure as painting a masterpiece or crafting furniture by hand, but trust me when I say there’s an art and satisfaction in getting it just right.
Hold tight, because the following paragraphs are going to guarantee two things: First; you’ll never look at fences quite the same way again. Second; instead of groaning about saggy fences ruining landscapes and posing security breaches, you’ll be itching for an excuse to get hands-on and wrangle some wires!
Let’s dive straight into how we can transform this seemingly mundane chore into an engaging DIY project together.
Choosing the Right Tools for Fence Stretching
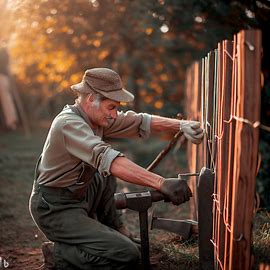
When it comes to stretching a fence by hand, having the right tools is crucial. Here are some essential tools you’ll need:
Firstly, you’ll need a pair of gloves to protect your hands during the process. In addition, be sure to have a tape measure on hand to ensure accurate measurements.
Next, you’ll need pliers and wire cutters for attaching and cutting the fencing material as needed.
A staple gun or hammer and nails will also be necessary for securing the fence.
Finally, investing in a come-along tool will make tightening and securing the fence much easier. This tool allows you to apply tension while positioning yourself properly during the stretching process.
Preparing Your Work Area Before Starting
Before beginning the fence stretching process, take time to prepare your work area.
Start by clearing any debris or objects that may obstruct your progress. Remove rocks or other items that could cause damage as you unroll and stretch out your fence material.
If there are existing posts, inspect them thoroughly for stability and reinforcement needs before proceeding with any further steps. It’s important to ensure that they’re strong enough to handle additional tension from stretched fencing materials.
In addition, make sure all necessary tools are readily available nearby so that you don’t waste time searching for them mid-way through your project.
Proper Techniques To Unroll The Fence
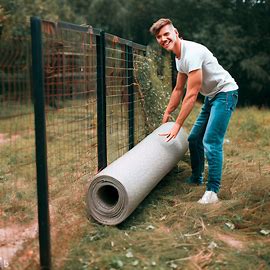
Once your work area is prepared, it’s time to unroll your fence material properly.
Begin by placing one end of the roll against one corner post of where you want your new fence line.
As someone else holds this position steady-but firm-push forward slowly but consistently over several feet until reaching their other corner posts.
Now continue rolling while carefully guiding both sides at an even pace. Make sure that the fence doesn’t sag or twist during this process.
When you reach the end of your desired fence line, cut the material carefully using wire cutters or pliers.
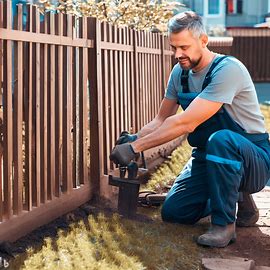
Attaching The Fence To The Corner Post
After unrolling and cutting your fencing material to the desired length, it’s time to attach it to the corner posts.
Begin by positioning one end of the fence against a corner post. Use nails, staples, or screws (depending on your chosen method) to secure it in place.
Ensure that there is enough tension in the fence as you attach it. This will help prevent sagging or slippage later on.
Repeat this process at each corner post along your fence line until all sections have been securely attached.
Using a Come-Along Tool To Tighten and Secure This Section of Fence
Once your fencing material is attached to each corner post, it’s time to tighten and secure the section using a come-along tool.
Position yourself near one of these areas while holding onto both ends securely with gloved hands – then pull back gently but firmly until reaching desired tension levels.
Be careful not to go overboard here since too much strain could cause damage elsewhere within our project!
Working With Tension Bars for Effective Stretching
Another effective technique for stretching fences manually involves working with tension bars.
Start by inserting tension bars into specific points along your newly installed fencing sections.
These bars can be adjusted as needed depending on how tight you want them pulled while still maintaining stability without causing any undue pressure elsewhere!
Fixing Top Rail Caps And Finish Fencing Sections
The next step in stretching fences manually involves fixing top rail caps and finishing off any remaining sections.
To fix top rail caps securely – use either nails or screws depending upon what makes most sense aesthetically speaking – then screw them tightly into place across each section’s top.
For finishing off any remaining sections:
- Unroll enough fencing material from its roll
- Cut it to desired lengths using wire cutters or pliers if necessary
- Attach these new pieces at appropriate points along with existing work that has been done so far
- Repeat the process until all areas are filled properly!
Securing And Tying Off The Wire Correctly To Enhance Tension
To enhance the tension in your fence, carefully secure and tie off the wire correctly.
Start by pulling the wire taut from one end of a section to another. Loop it around a corner post or through an eye screw for added stability.
Make sure to create multiple loops if needed, as this will provide additional strength and prevent potential slipping over time.
Tie off the ends securely with a strong knot, ensuring that there is no play or movement in the wire. This will help maintain tension throughout your fence.
Fence Puller Placement: Top Vs. Bottom
When considering where to place your fence puller for optimal stretching results, you have two options: either on top or bottom.
Placing it on top allows for easier access during the stretching process since you won’t need to bend down as much. However, some find that placing it at the bottom provides better leverage due to increased stability and grip.
Ultimately, choose what feels most comfortable and effective for you while still achieving proper tension within each section of fencing material!
Avoiding Common Mistakes In Maneuvering A Fencing Stretcher Plate
While maneuvering a fencing stretcher plate can be challenging, there are common mistakes you can avoid.
- Ensure that your plate is always securely attached before applying pressure. Loose plates can cause accidents or damage during use!
- Make sure not to overload your plate with too much tension or weight – this may cause it to warp or break, leading to potential injury.
- Always keep the plate level and stable while moving it along your fence line. Any tilting or wobbling could compromise the stretching process.
Safety Measures During Manual Pallet Jack Operation
During manual pallet jack operation for maneuvering a fencing stretcher plate, safety should be of utmost importance.
Wear appropriate protective gear such as gloves and steel-toed boots to protect against any potential hazards.
When lifting or moving heavy loads with the pallet jack, use proper lifting techniques to prevent strain on your back and muscles. Maintain good posture and distribute weight evenly.
Additionally, ensure that you have clear visibility of your surroundings when using the pallet jack. Be aware of any obstacles in your path and take necessary precautions.
Periodic Checks And Maintenance After Installation Of The Fence
After installation of your stretched fence, regular checks and maintenance are essential for its longevity.
Periodically inspect the tension in each section by visually checking for any sagging or slackness.
Make adjustments as needed to maintain optimal tension levels.
Check all attachment points such as corner posts, top rail caps, and tie-off points for signs of wear or damage. Replace any worn-out components promptly to prevent further issues.
Furthermore, conduct routine inspections for any loose wires or nails that may have come undone due to weather conditions or other factors. Secure them tightly if necessary.
Conclusion
Stretching a fence by hand is an achievable task with the right tools and techniques. By following this step-by-step guide, you can create a sturdy fence that enhances both security and aesthetics in your backyard!
Remember to prioritize safety throughout the process and perform periodic maintenance checks after installation for long-term success.